Home automation definition and introduction
What is home automation exactly?
(I apologize for mobile readers for article design flaws)
Referred to as domotic or smart home which falls under the IoT (internet of thing segment)
We will be covering the IoT in another article, for now, I will focus on Home automation only.
So simply home automation is the ability to control, monitor and automate your Home technology and electricity (meaning by that appliance and power current).
For example, a fairly automated house using the latest popular devices in the market can be the following.
Starting with Security system where sensors are used to monitor and cover many (an unknown word that describes fears =) such as
- Door, windows and drawer sensor
- Motion and body heat detector
- CO detectors
- Fire detectors
- Gas detector
- Water flood detector
- Environment sensor (detect current temperature, humidity, light Lux, and maybe sound level”


Of course, there might be more sensors that can cover other sections of interest but mostly these are the most common ones.

Parallel and as an add on the security sensor kit, smart cameras can also be used to monitor the house and the surrounding, also it can be used as front door ring and communicator using a camera with push notification and 2-way voice.

Doors control to get access to enter the house or any specific room if needed can be covered by what is so-called the smart door lock device, where you have the ability to control who can have access and to your house and when.
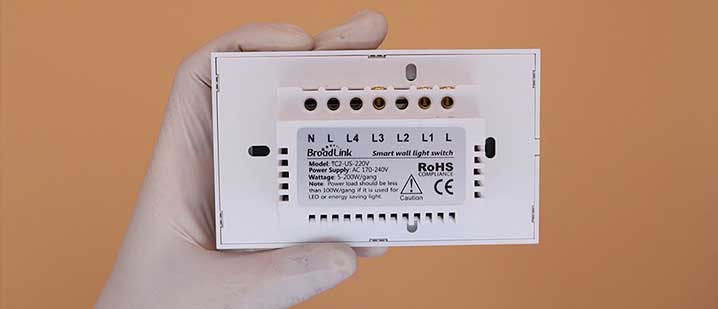
Lighting control has many types of devices that can be used like smart switch panel, smart bulb, smart light strip, smart micro relay, a smart plug, and a smart bulb socket. These smart devices’ features vary between one and another wherein some you have the ability to switch ON/OFF and others have the ability to dim and change the color light (RGB). and of course, the installation varies, depending on the needs of the situation.


An appliance such as coffee machines, microwave, washer, well mainly any traditional appliance with a plug can be controlled using a smart plug or smart power strip, also the features depend on the appliance specification such the power consumption and voltage.
An appliance such as coffee machines, microwave, washer, well mainly any traditional appliance with a plug can be controlled using a smart plug or smart power strip, also the features depend on the appliance specification such the power consumption and voltage.

Devices that can be controlled by an IR remote control such air condition, television, sound system and so on, these devices can be controlled through an IR hub that can take control of all appliances in a range less than 8 meters and with direct ”*vision”.

House drapes, curtains and shutters can be controlled by using a smart meter or if they already have an electric motor a smart switch controller can be used.

Power relay switch devices can be used to control, things such as water heater, heating units, and similar appliances.
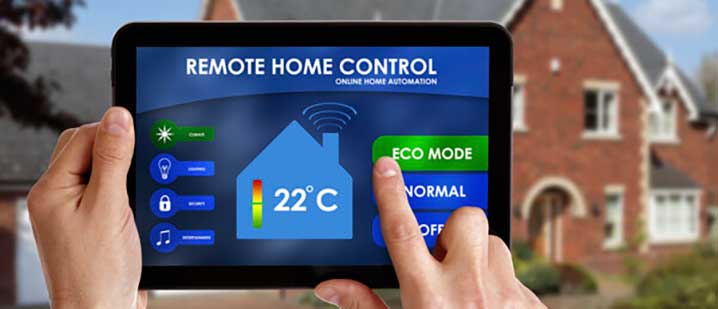
Mainly a well automated home will be controlled from one platform which includes many features and tools that can help more in automating and organizing house appliances.
For instance, features such creating scenes that can do several actions at once, for example, a out of home scene will send an order to switch OFF the TV, all Air conditions, lights, close the drapes, lock the main door and lock the security system or the opposite. These scenes can be customized as needed of course.
Another feature that is available in most systems, is the IFFF interaction, where a sensor-specific state can send action order to any smart devices, for example, the door sensor can trigger the alarm siren and send notification alert, also the motion sensor can send an order to switch a specific light on when a motion has been detected, or when the temperature sensor state get to a certain level it will automatically turn on the AC unit or the opposite (to maintain the house a certain temperature). Also, these triggers or scenarios can be customized as needed.
As for the monitoring, many features are available, like history state of smart devices, energy monitor (power meter) where you can monitor power spending in history in voltage and watts where also you can read the history and get to know the cost of the consumed power of a specific device, room or even the whole house.


Integration, most of home automation devices developers are tending to create some integration with other developers, especially with well-known brands devices. For example, the smart speakers created by Amazon and by Google, most of the H.A manufacturer and developer if not 90% of them makes sure that their devices work with these smart speakers, also some brands control hub can also communicate with other brands model, for example, some Chinese manufacturers have united the application platform where it can control several brands, which gives big advantage and a large product line that can be controlled from the same platforms.
Some US brands work together by creating a partnership, where each brand hub is able to control many other smart devices by uniting the same communication technology of the devices and by including the same algorithm in their codes and firmware, so any hub control or brand will list his partner brands.
As it has already been said that this technology is developing each day, and each brand is focusing on a specific solution of that technology, that is why the partnership has been created because is it’s hard for one company to cover all solution scenarios and needs.
5 to 6 years ago this was a luxury and expensive technology so it was rarely adopted, you can say that wealthy people were able to acquire such tech, and it was hard to install and maintain. Installation was very complex and needed a specialist and days of work, even the maintenance needed professionals. Though now the cost has been down by at least 300% if not more, usually a house used to cost not less than 15k to be automated, now 1k average can do the job.
Also, the installation is very easy anyone with the will to do it will be able to do installation, no need to any professional, as each device can take 1 minute to be installed and configured, though still some people still request specialist, even with this it will not cost that much that because any technician with a good IT knowledge can do the job with way less manpower cost that old tech specialists.

Some people might still ask what’s in it for me, how can I benefit from this automation at my house or my life or why should I spend my money on such luxury.
Well, I won’t call it luxury, because this tech has its audience and its solution benefits.
By the time people are getting busy in making money, many house members spend most of their days outside the house working till 5 pm at least, such tech is made to help these people in several aspects, such as saving time, organizing their life and saving power energy.

Let’s take a daily routine as an example:
You wake up each day a 7 am, the water heater has been automatically turned on at 4 am and when the water reached the needed temperature the water heater goes off at 5:30 am, you waked up and took a hot shower, at the meantime the Living room Ac and tv automatically turned on and set to the News channel, in the kitchen the coffee maker automatically goes on and made your coffee ready.
You didn’t waste any second, you had your coffee and your breakfast and watched the news, at 7:30 you left the house, the out of house scene has been activated and turned off all air conditions, televisions, lights and locked the security system.

You got to work and at 12 pm, your online order has reached your door and the delivery guy arrived at your front door house and knocked the bell, you instantly got a notification that there is someone on your front door, you simply opened your front door camera and communicate with the delivery and gave him access to your delivery box and opened it remotely so that he can place your order in it to be safe and you locked it after he left.

Your housekeeper get to your door at 2 pm and rang the bell, you get a notification and saw here on the camera and opened the front door to here so that she can get it and do here job while you are able to monitor here from the installed cameras and sensors, after one hour she left and the door has been locked.
At 3 pm the water heater goes on for 1 hour so that the water gets hot enough for after-work shower.

You finished work at 5 pm and head home, the trip will take you 30 mins, and at 5 pm your bedroom and, living room Air conditioner goes on to set and keep the house at a cool room temperature monitored by the sensor interaction.
You reached your house and got into a cool house environment, you got a hot shower and got to the living room.
Now it is bedtime, and your bedroom AC is already on to a healthy night temperature and the air purifier has been on for like 50 mins so that you can have a quiet and refreshing sleep.
The security system has been locked and all unnecessary appliance is OFF.

In conclusion, home automation technology has a lot of benefits, because it will save you time and money by reducing a lot of routine tasks, organizing and monitoring your house power consumption. Also, you are not obliged to apply to everything, you might automate only what you think is best for you and if you decided to automate more device it will be easy.
This the future technology, later in the future this technology will be combined with the AI technology where the AI will take a decision depending on the routine and repeated actions so the AI will manage our house life n the best way possible.
So my advice to anyone is to adopt such technology and one day you will know that it was the right decision.